10 Admin tips for Microsoft Teams
When managing Teams, administrators should pay attention to various things. It is important not to make the environment too confusing or make the job harder than it needs to be. For this purpose, the various options for administration are available in the Teams Admin Center, but also via the conventional Teams client.
In larger networks, add-on solutions such as my-IAM TeamSpace offer advantages, as they make the work of admins and users easier and at the same time provide more order and flexibility in the work environment. Data protection and security settings also play an important role in Teams. We also provide a tip or two on this in this article. Admins can access the Teams Admin Center via the URL https://admin.teams.microsoft.com.
Index
Tip 1: Use team templates
Team templates make it easier for admins to create teams, as some settings can be predefined centrally, making teams clearer. By using templates, the actual creation of teams can also be delegated. At the same time, it is ensured that the teams comply with the specifications of the templates. The templates are managed via the “Teams \ Team templates” area.
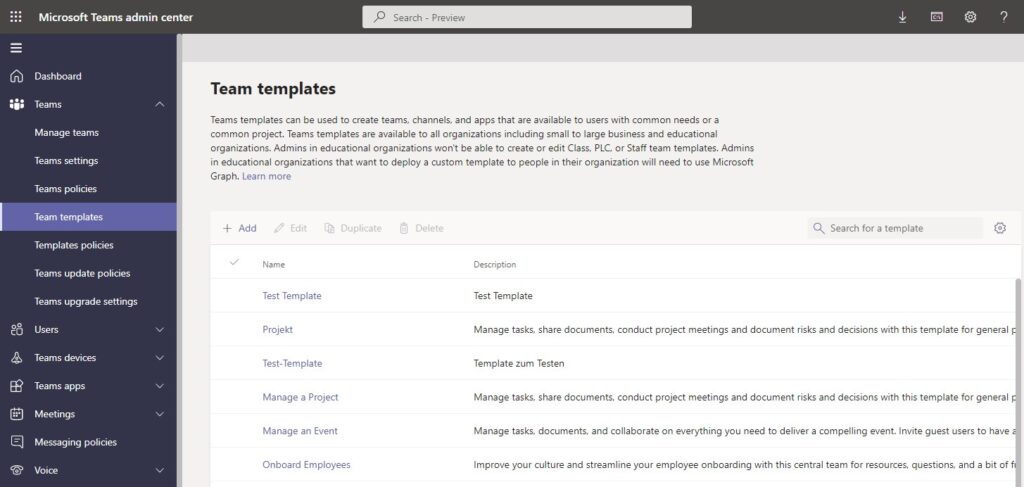
Team templates help to keep order when creating teams.
Tip 2: Create your own team templates
In many cases, of course, the specifications of the Microsoft Teams templates are not sufficient and you have to create your own templates. For this purpose, the menu item “Add” is available in the team templates. Here, three options are available to simplify the creation of templates. First, templates can be created based on existing teams or based on existing team templates. But also the creation of an empty template is possible at this point. These templates can in turn be used when creating your own teams.
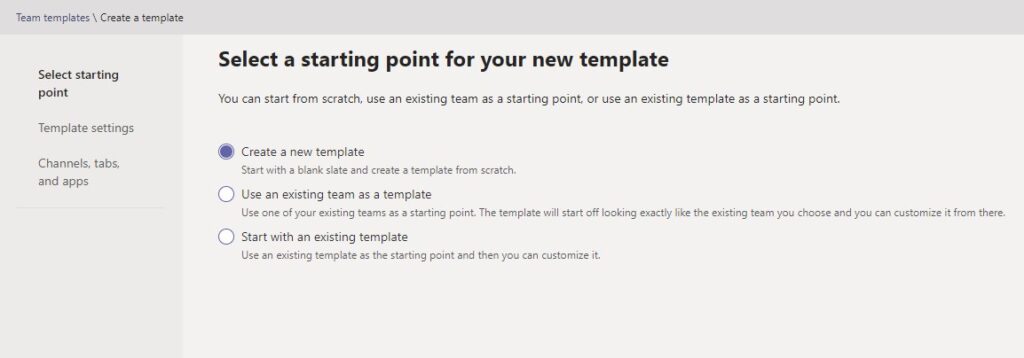
Create a new team template based on existing teams or existing team templates.
Tip 3: Delete teams that are no longer needed
Teams that are no longer necessary should be deleted from the environment. This significantly reduces the effort required for administration, data backup and data protection. Data and documents can also be stored in Teams. If no one uses this data anymore, it is also not necessary to continue storing it in the team. In the case of personal data, the GDPR also plays an important role here.
Many teams are only needed for a certain time anyway and can be deleted afterwards. For this purpose, admins should create a reminder and delete the teams in this case. When using my-IAM TeamSpace these tasks can be automated. Already during creation, the person in charge can specify that the team can be automatically deleted after some time. In this case, admins no longer have to worry about the deletion.
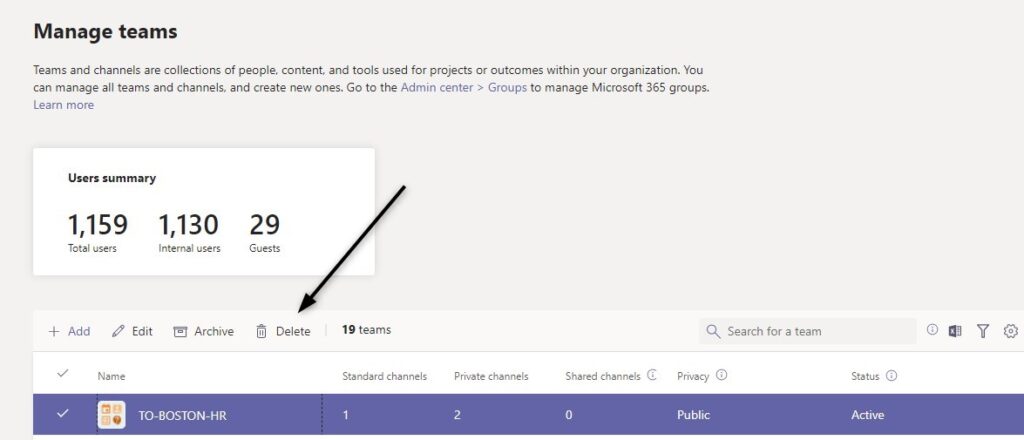
Teams that are no longer needed should be deleted. Better is an automatism. However, this requires additional solutions such as my-IAM TeamSpace.
Tip 4: Set the right security settings for Teams
Of course, not every user should be able to access every team. Therefore, there are numerous security settings in Microsoft Teams that admins can specify centrally and team owners can also customize. The settings can be found in the Teams options. In addition, there is the option to hide the visibility of teams or to control it in such a way that certain users can see various teams but are not granted access until a team owner authorizes them to do so. The assignment of permissions should therefore be well planned.
Unfortunately, Teams is rather confusing at this point and offers various setting options. Here, too, additional tools such as my-IAM TeamSpace help to control the rights more easily. To do this, the service can provide a security controller (“slider”) when teams are created. Behind the slider is a flexibly customizable mechanism that automates and correctly sets the individual rights.
When using my-IAM TeamSpace, admins can assign various security and permission levels for this purpose, as well as visibility settings. Based on these defaults, users can assign consistent permissions by simply using the security control sliders. This also makes it easier for users to complete the creation of teams more quickly. Security options can be defined behind the security controllers, making them consistent and easier to implement.
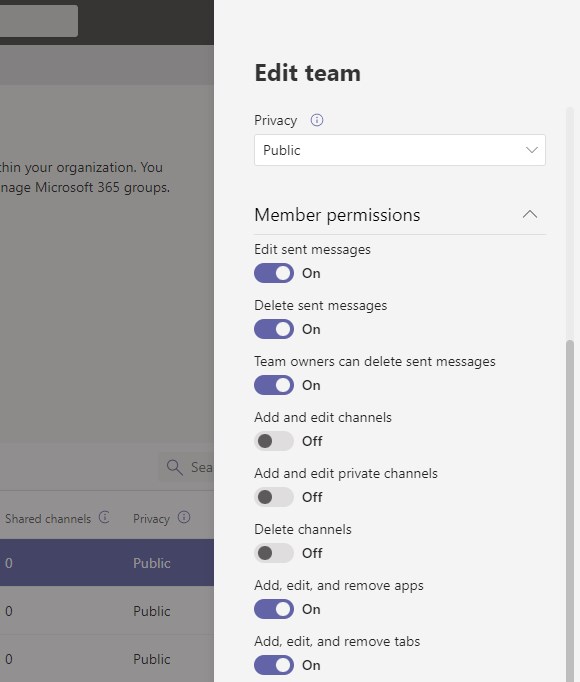
Permission settings can be found in various places in the Teams Admin Center and the Teams client. This can quickly become confusing.
Tip 5: Follow naming conventions
Especially when using many teams, strict attention should be paid to ensuring that the names of the teams correspond to conventions. This allows teams to be assigned more quickly and also to be found more quickly by users and admins and managed much better. Unfortunately, the naming conventions must be observed manually.
There are no options in the Teams Admin Center to control team naming, not even via team templates. Again, an ideal complement to Microsoft Teams is the use of my-IAM TeamSpace. Here, naming conventions can also be specified and implemented by users much more easily than with team templates or regulations.
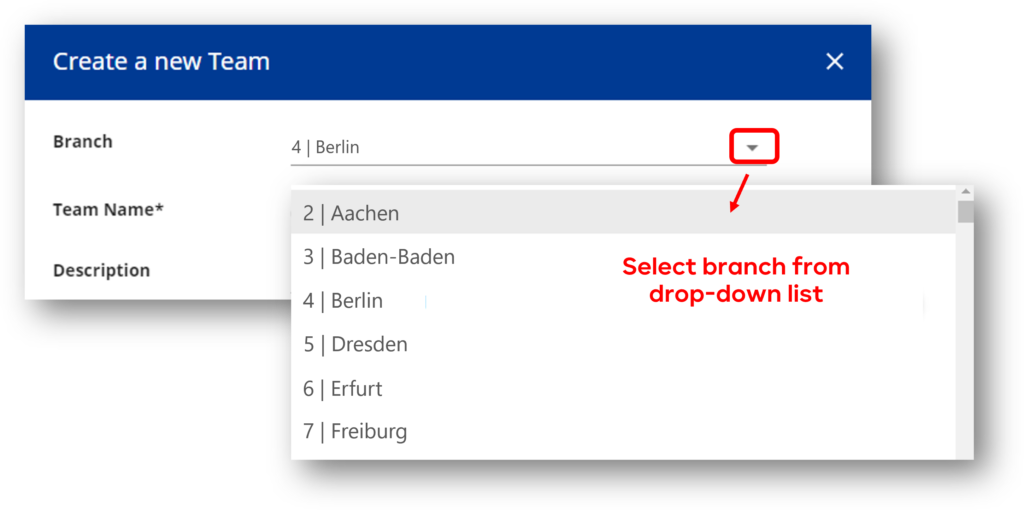
Naming conventions play an important role the more teams there are.
Tip 6: Relieve IT department and engage users in managing teams
The previous tips have already shown how important it is to also involve users in the management of Teams. Users ultimately work with the teams and if IT staff have to take over tasks for all changes to teams, the IT department will quickly become overloaded.
However, if users are allowed to create teams themselves without any specifications, this in turn results in uncontrolled growth, orphaned teams or duplicate teams where no one knows where to find which information. As a result, the IT department loses control, and compliance is almost impossible to maintain. This in turn results in a great deal of effort that is necessary to bring order back into the chaos.
Through a delegation of permissions and an approval workflow, users can create teams themselves, but their final creation must first be approved by a responsible person in the company. Unfortunately, Teams is not able to define such an approval workflow for this purpose. However, with tools like my-IAM TeamSpace, this is not a problem either.
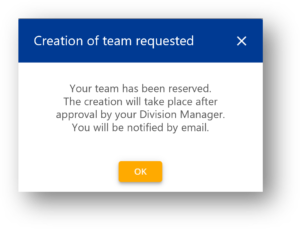
Approval workflows can greatly simplify team creation.
Tip 7: Use policies and limit permissions
In the Teams Admin Center, “Teams Policies” provides options for defining your own policies, which can be used to implement a variety of security options. In the article “10 tips for more security in Microsoft Teams” by Security-Insider.de, various options for implementation can be found, with which the protection of Teams can be further improved.
Tip 8: Set the order of apps in Teams
One of the strengths of Microsoft Teams is that external apps can also be integrated. These can be seen in the Teams client with the users. The individual apps that are available in Teams can be found in the Teams Admin Center via the “Teams apps” section. Which apps are allowed at all is set in “Manage apps”.
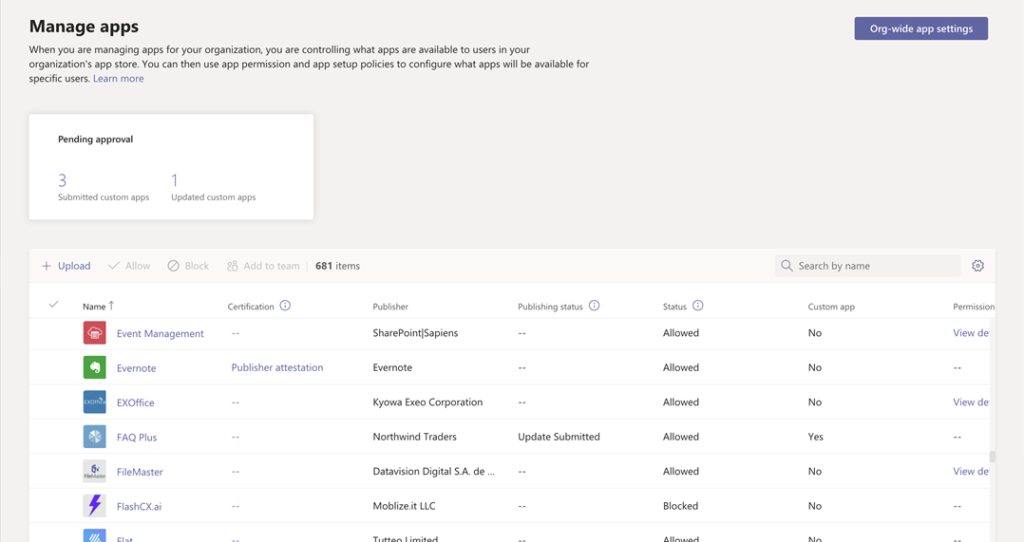
Manage the apps that are available in Teams.
The order of these apps can in turn be defined in “Setup Guidelines” in the “App Setup Guidelines”. This allows important apps to be placed higher up. Again, it may be easier to work with the settings of the templates and the possibilities of my-IAM TeamSpace. However, policies can also be used in parallel.
Tip 9: Control screen sharing and other content sharing with policies
Under “Meetings” and “Meeting Policies”, the “Content sharing” option can be used to specify which sharing actions users are allowed to perform. Screen sharing can also be controlled here. The settings should be specified centrally.
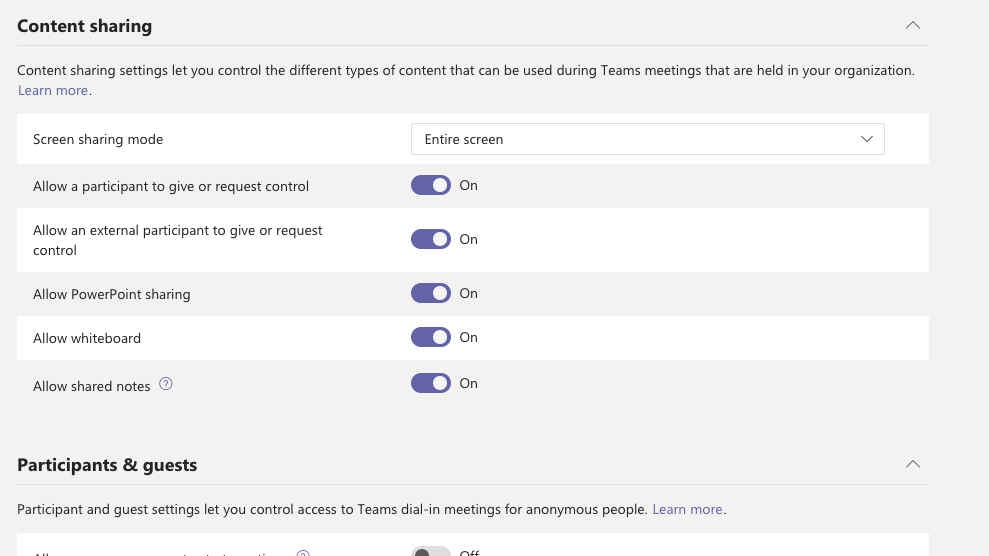
Policies can also be used to control screen sharing and other sharing for users out of Teams meetings.
Tip 10: Control external access
The “External access” menu item in the Teams Admin Center can be used to define whether and how users in the company are allowed to contact users from other organizations, for example via Skype. Only individual domains can also be stored here.
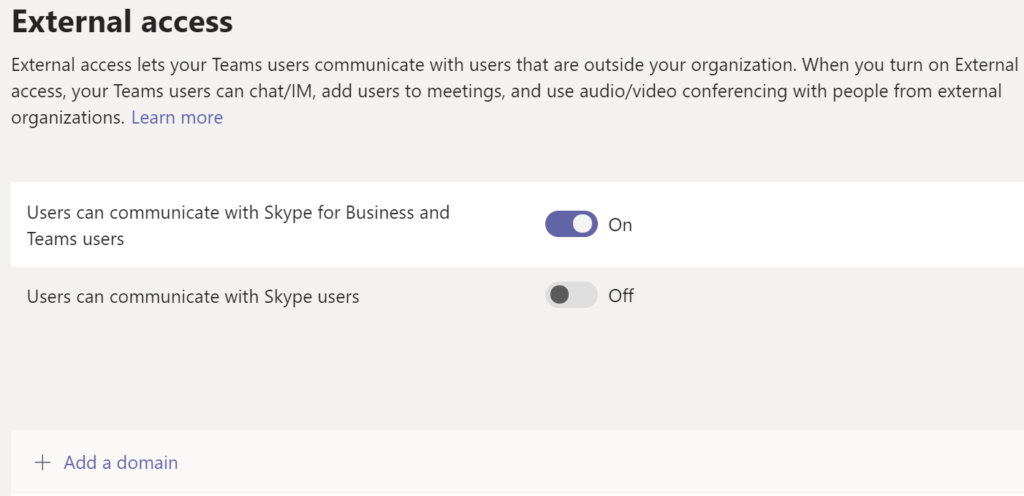
Specify external access to organizations.
my-IAM, the cloud identity management platform of FirstAttribute AG, offers various solutions around Microsoft Teams that simplify the work of IT managers and amdinistrators. Do you want to know how we simplify, accelerate and secure your Teams management processes? Contact us!


